|
LYNQ is shipped with 8 pre-configured Workbench Terminal definitions ready for immediate use. The configuration of these terminals has been designed to service well established manufacturing models and you can start to use them as a template with minimal further configuration.
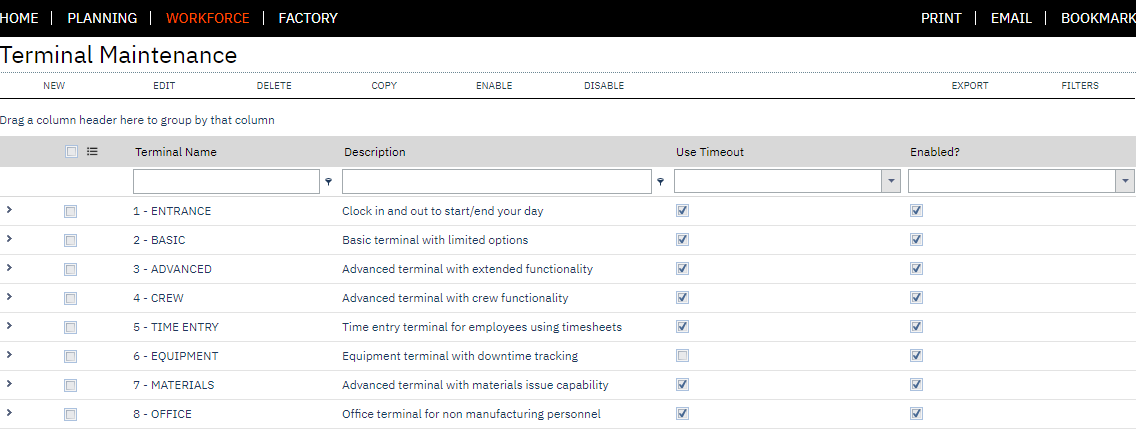
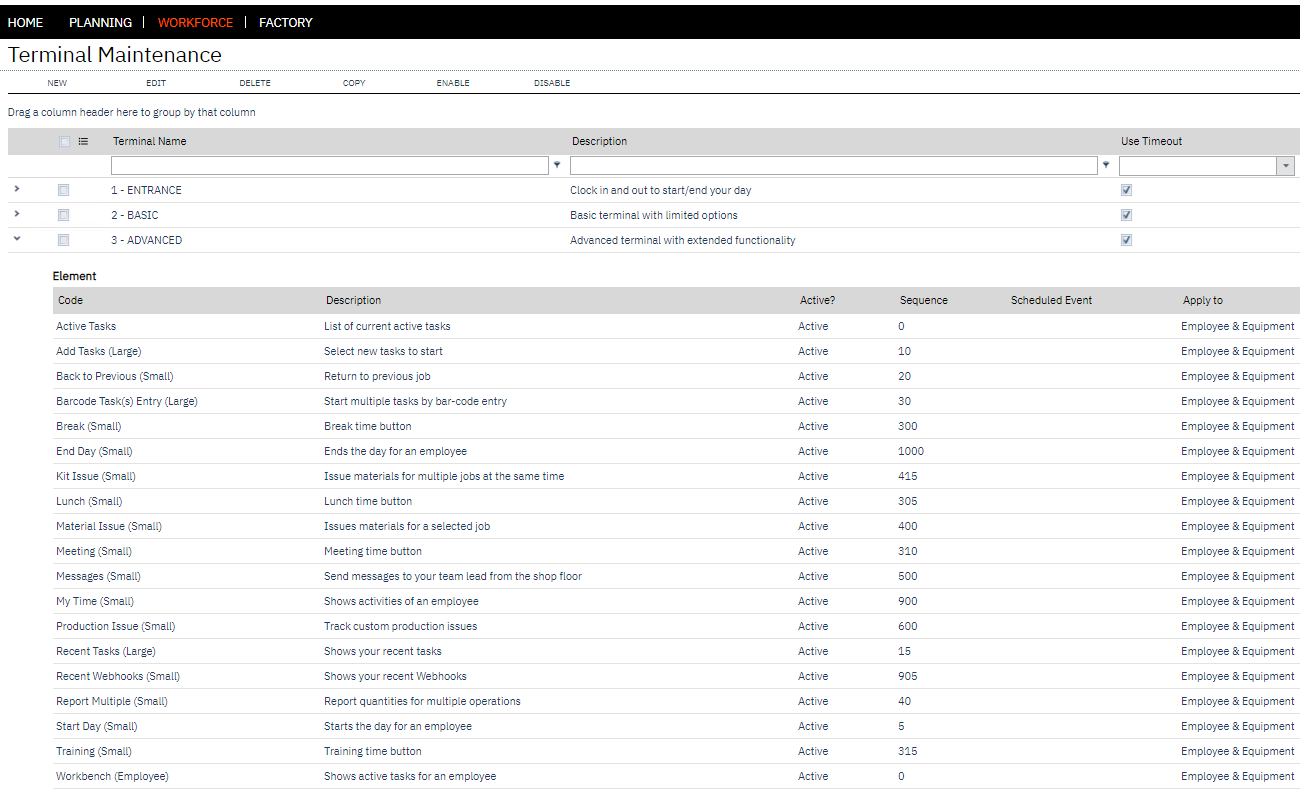
Expand the terminal record to show which on screen elements are assoicated to the terminal. Use the edit button to turn on or off the required on screen elements.
The recommended way to produce your own additional (custom) Terminals is to use the COPY function, selecting one of the 8 pre-delivered definitions to copy. You can disable the new terminal until it is ready to be used.
Copy a Pre-configured Terminal
1. Select Terminal Maintenance
2. Place a tick in the box next to the name of the Terminal you wish to copy
3. Click on Copy (a new "Create Terminal" window appears).
4. Enter a new Terminal Name and Description
5. If appropriate, Lookup and select Linked Equipment for this Terminal by clicking on the 3 dots
6. If appropriate, do the same to select a Crew Code
7. Enable the "Use Timeout" if you want to display the Clock Screen Saver
8. If Terminal is to be linked to Equipment, ensure the Equipment Terminal setting is using "6 - Equipment"
9. Enable Access Control if required (Click on the 3 dots to select users)
10. Enter a password if you want the Terminal password protected
11. Check and update which On-Screen Elements are required on your new Terminal.
12. Click on Save
Amend the Terminal Configuration
When copying one of the 8 pre-defined Terminals you should not need to make any changes to your new Terminal Configuration. However to amend any of the above settings should you make a mistake whilst copying the Terminal, select the new Terminal Name from the Terminal List then click the Edit button.
Test your new Terminal from the Workbench
1. Select Workbench
2. Click anywhere on the Workbench Screen Saver to access the workbench
3. Underneath the Workbench login entry, click on Terminals
4. Select the newly created Terminal from the Terminal List
5. Enter an employee number to view/check your new Terminal setup.
|

